Editing Workstation Scanner Settings
From the eSign menu, click your username and then Workstation Scanner Settings to edit your default workstation scanner settings directly from the Edit Scanner Settings page in eSign. The availability of the Workstation Scanner Settings menu is controlled by your Administrator. Your settings may differ from the ones displayed in this section depending on the Administrator settings. The availability of scanner settings selections is dependent on your scanner. High definition and large area scans will result in large file sizes. Refer to eSign Scanner Client Icon for details about the eSign scanner. Depending on the settings configured by your administrator, this feature may not be available.
If you are prompted to install the DynamicWebTWAIN add-on, click Install.

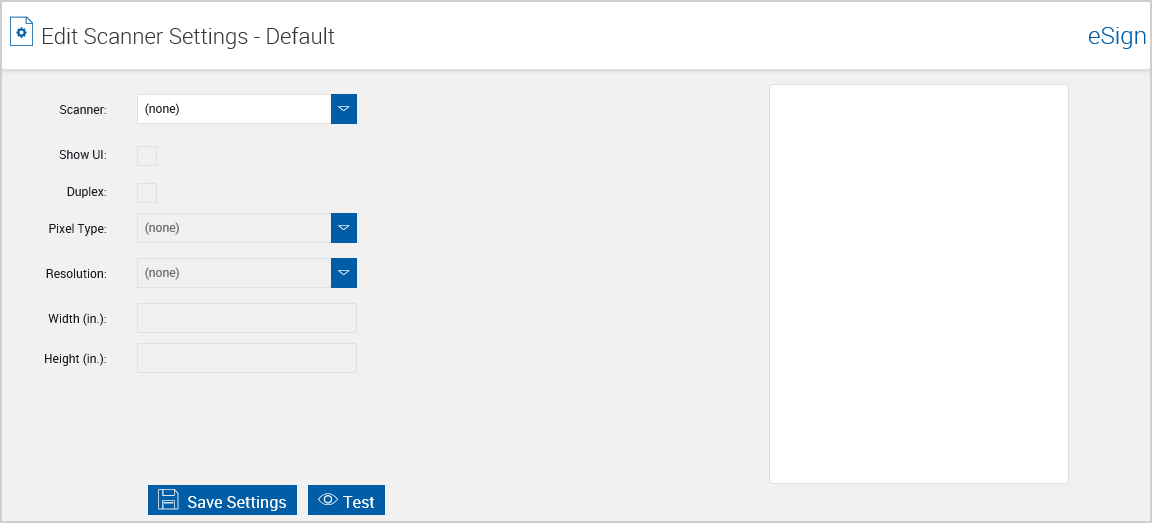
To edit your default workstation scanner settings, perform the following procedure on the Edit Scanner Settings page:
- Select a scanner from the dropdown menu and change the settings as necessary for your configuration. It is not recommended to enable the Show UI setting. Click Test to verify the settings. Click Download eSign Scanner Service to download and install the eSign Scanner Service.
- Click Save Settings to save the workstation scanner settings.
Note: Errors may occur if the eSign Scanner Service is not installed by a user with administrator privileges. It is highly recommended that the eSign Scanner Service is saved and then installed as an Administrator.