Adding Documents: Library
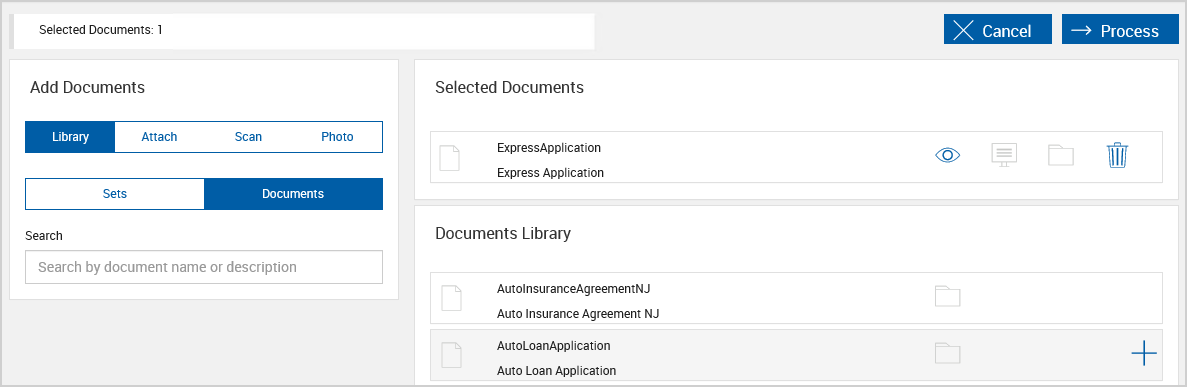
Add documents to a session using the Add Documents feature. Click Library to add documents or document sets from the library. This option is applicable to XML sessions only. For sessions created from Processing > Create New Session and for certain integrations, Library is the only option available and therefore not displayed.
Encrypted PDF documents cannot be attached. Attached documents must be less than 5 MB in size. A maximum of 10 documents can be attached per session. A maximum of 100 document pages can be attached when the session will be sent for remote signatures. Supported file formats are BMP, GIF, JPEG, JPG, PDF, PNG, TIF, and TIFF.
Refer to Adding Documents to a Session for general information about using the Add Documents feature.
To add documents, click Library. If Library, Attach, Scan, and Photo tabs are not visible, Library is automatically selected. The information shown and described here may differ from what you see depending on the administrative settings, browser, device, environment, and integration that you are using.

|
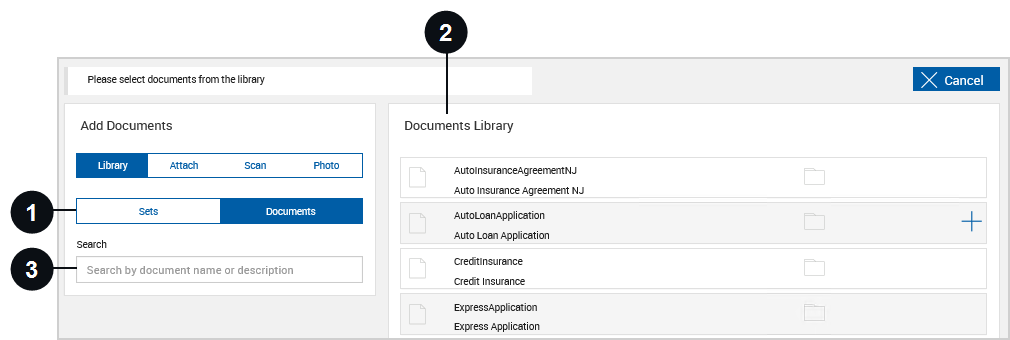
Documents or Sets | If Documents is selected, the Documents Library displays all of the documents in the library. If Sets is selected, the Document Sets Library displays documents organized by document set. |

|
Documents Library or Document Sets Library | The Documents Library and Document Sets Library lists the available documents. When Documents is selected in the Add Documents area, the Documents Library is displayed. When Sets is selected in the Add Documents area, the Document Sets Library is displayed. Click the title row to expand and collapse the available documents. If Documents is selected in the Add Documents area, the Documents Library is displayed. To select documents, click Select Document
If Sets is selected in the Add Documents area, the Document Sets Library is displayed. To select all of the documents in a document set, click Select Document Set If a document set or part of a document set is added to the Selected Documents area, the Select Document Set |

|
Search | Use the Search field to search for documents or document sets by name or description. When Documents is selected, the search results only display documents. When Sets is selected, the search results display documents and document sets. |
When documents are added to the session, the Selected Documents area is displayed. Preview documents, adjust the display settings, and delete documents as necessary.
|
|
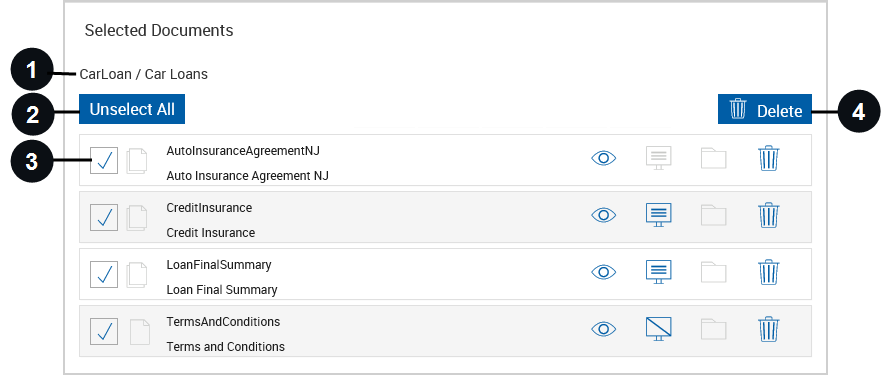
Name of Document Set | If a document set or documents that are part of a document set are added to the Selected Documents area, the name of the associated document set is displayed here. |
|
|
Unselect All / Select All | When there are four or more documents, the Unselect All button appears. Click the button to toggle between Unselect All and Select All. When Unselect All is clicked, all of the documents that were checked become unchecked. When Select All is clicked, all of the documents that were unchecked become checked. |
|
|
Checkbox | When there are four or more documents, a checkbox is displayed next to each document. When the checkbox next to a document is checked, clicking Delete will remove that document from the Selected Documents area. When the checkbox next to a document is unchecked, clicking Delete will have no effect on that document. |

|
Delete | Click Delete to remove selected documents from the list. |
Once you are done adding and deleting the documents for the session, click Process. Refer to Processing Documents for details about processing the documents. After you process the documents, you can still add documents to the session using the Add Docs button on the Session Details page.