Adding Documents: Photo
Add documents to a session using the Add Documents feature. Use the Photo option to take a photograph and attach it to the session.
Encrypted PDF documents cannot be attached. Attached documents must be less than 5 MB in size. A maximum of 10 documents can be attached per session. A maximum of 100 document pages can be attached when the session will be sent for remote signatures. Supported file formats are BMP, GIF, JPEG, JPG, PDF, PNG, TIF, and TIFF.
Refer to Adding Documents to a Session for general information about using the Add Documents feature.
To take a photograph for this session, follow these steps.
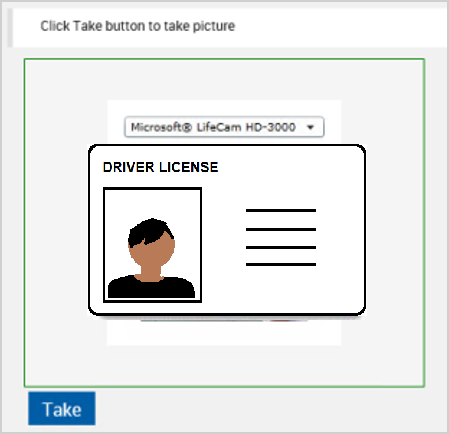
- Click Photo and select the desired values for each field. Once the values are entered in the fields, the camera becomes available.
-
Select a camera from the dropdown menu and click Take to take the photograph. Once the picture is taken, the photograph appears in the area to the right of the page.
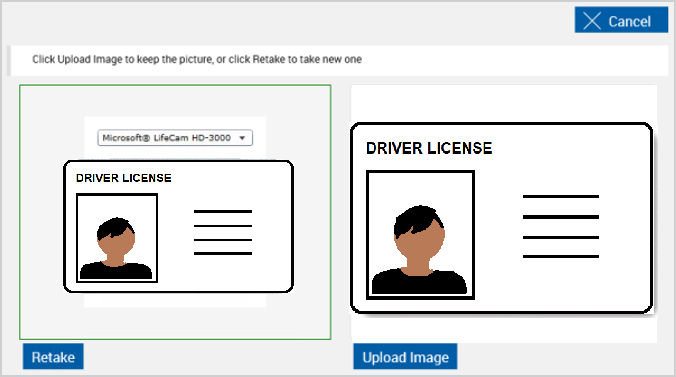
- Click Retake to take another photograph. Click Upload Image to add the photograph to the document set.
-
If another photograph is needed, adjust the fields as necessary and use the Retake button to take another photograph. When you are done adding documents,

|
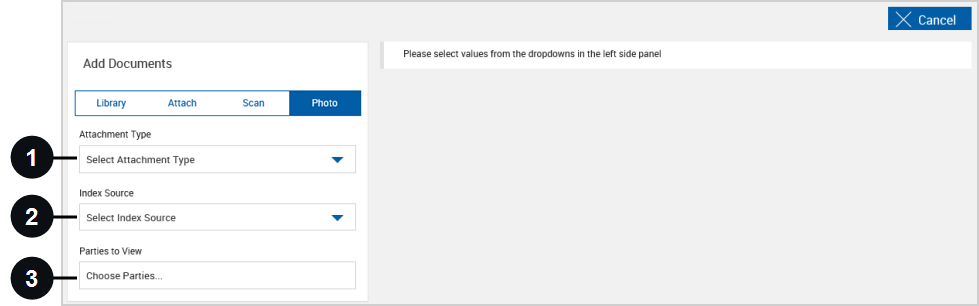
Attachment Type: Select an attachment type from the dropdown menu. |

|
Index Source: Select a document to be used as an index source. |

|
Parties to View: Select one or more parties to have them view the file during the signing and reviewing process. |
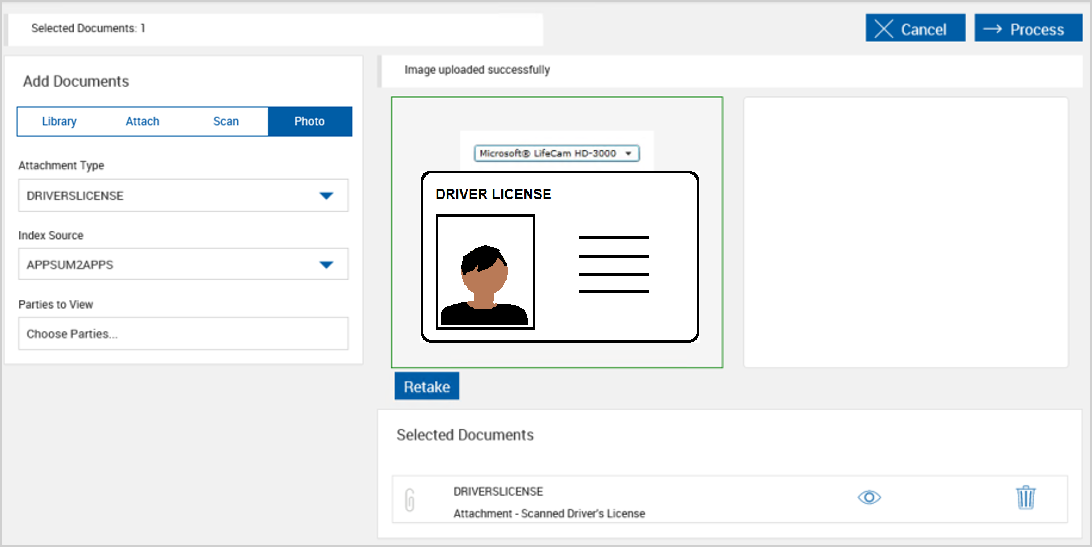
The photograph is uploaded. Depending on the page, the Selected Documents or Documents section is displayed. The uploaded file is listed in the Selected Documents or Documents section.