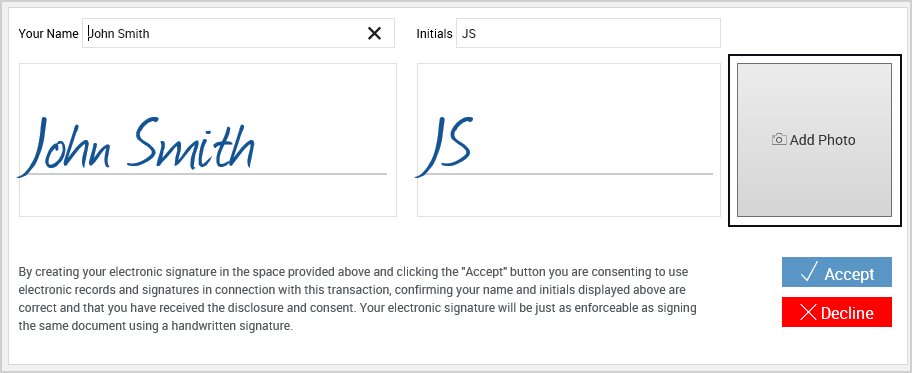
Adding a Photo
Add a party's photograph during the in-person signing process using the Add Photo button on the Consent page. When a photo is captured, the photo will appear next to the signature throughout the document(s). The picture is automatically resized in the document. To add a photo, your workstation must have a camera attached and set up. No physical file outside of the application can be used.
When signing in person, add a photograph on the Consent page using the following procedure:
-
Click the Add Photo button.
-
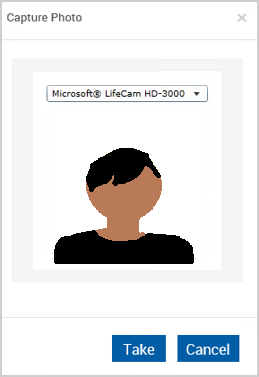
In the Capture Photo popup, select your camera from the dropdown menu if necessary and click Take to capture the photograph. Click Cancel to exit the Capture Photo popup.
-
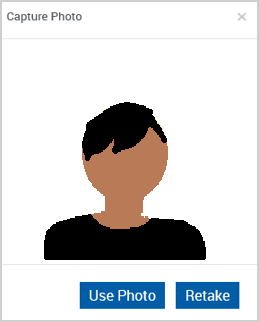
Once the photograph is captured, click Use Photo to use this image or click Retake to replace the photo with a new captured image. If you have chosen Retake, the photo box clears and is ready to capture a new photo to your satisfaction.
-
The Consent page refreshes with the photo in place of the Add Photo button. Click Clear to remove the picture. Once the photograph is captured, continue with the signing process as outlined in Consent Page.