Upload Documents (XML)
|
Stop: |
Use only original PDF documents saved by LiquidOffice Forms Designer. PDF documents from the server’s FI\SourcePDFs folder should not be re-uploaded. During the upload, eSign will convert each PDF to IMM's proprietary format. For this reason, uploading documents takes longer than in prior versions of eSign. The best practice is to upload up to 25 documents at a time. |

|
|
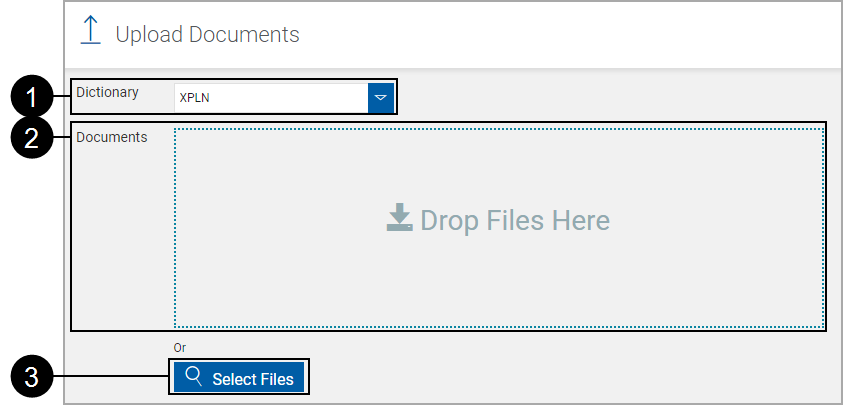
From the Document Maintenance (XML) page, click Upload Documents. |
The Upload Documents page appears.


|
Select a dictionary from the Dictionary drop-down list. |
||

|
Drag and drop existing PDF documents to the Drop Files Here field.
|
||
| - OR - | |||

|
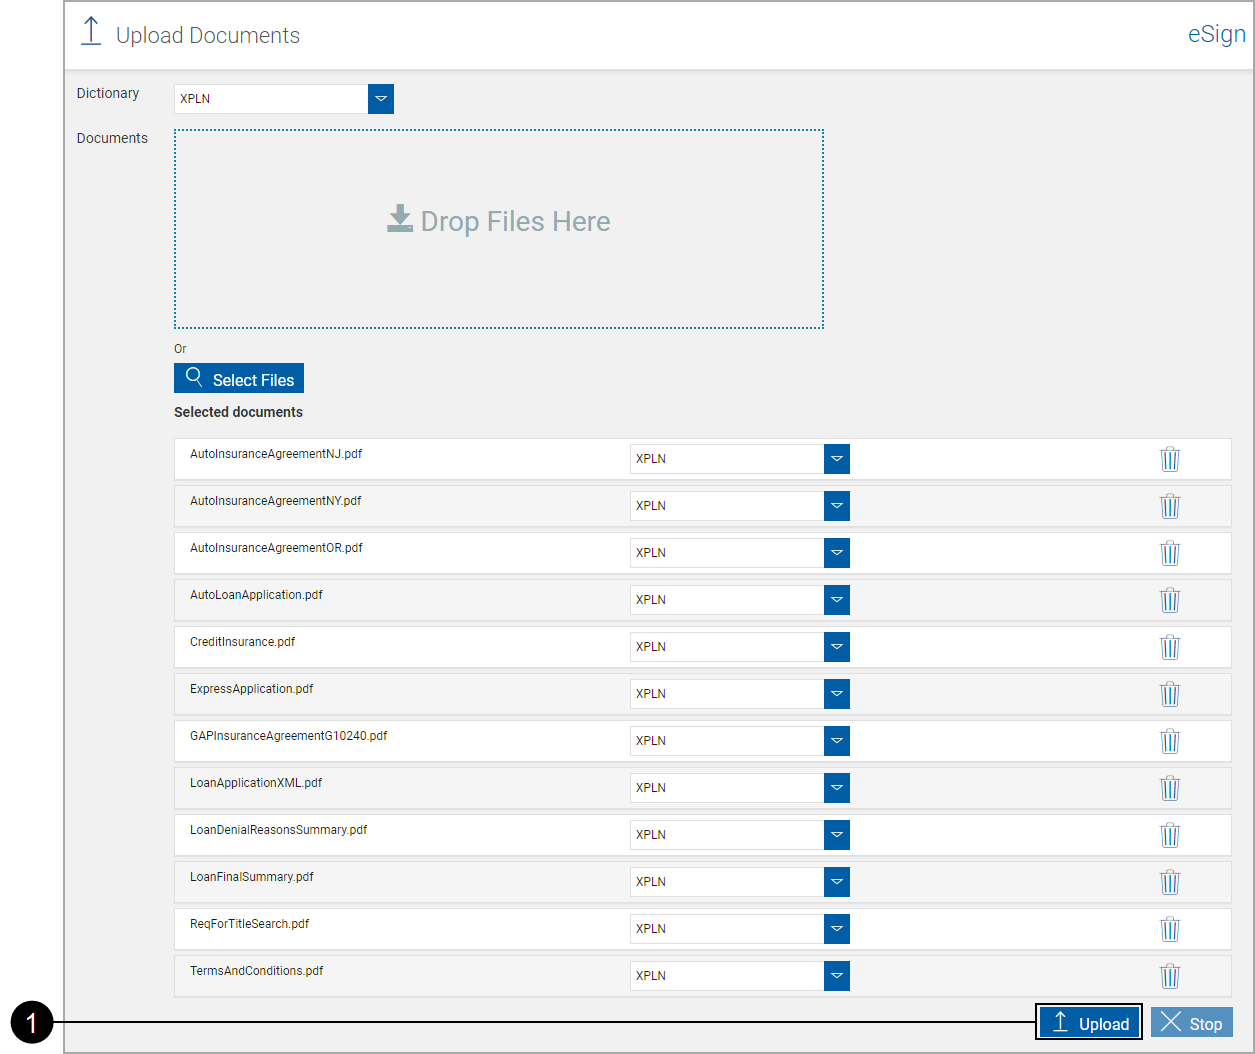
Click Select Files to navigate to and select the folder with your documents. Select one or more documents to upload. Click Open. |
The Upload Documents page refreshes.

The Upload Documents window refreshes showing upload progress.
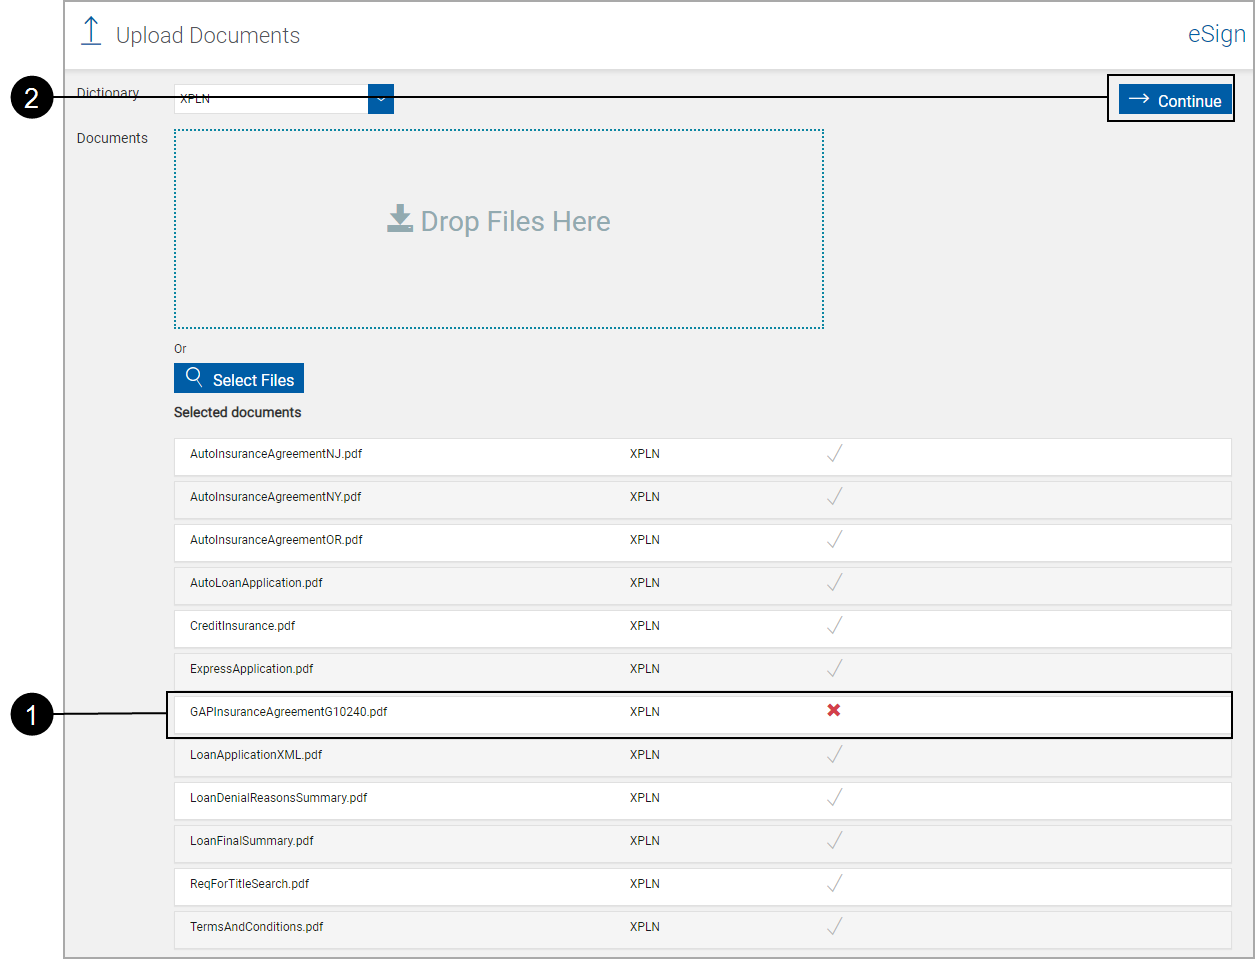
Successfully uploaded documents will display a check mark.
Failed uploads will display a red X. A failed upload may occur if a document has previously been uploaded to a different dictionary. Documents uploaded to the wrong dictionary will not display an error; these documents will display an error during processing.
Documents can be re-uploaded and will overwrite existing documents. The most current document will be used for processing.

|
|
Click any failed document row for more information. |
|
|
Click Continue. |

Repeat these steps for any additional dictionaries.
The Document Upload process is complete.
After documents have been uploaded, edit document field information as necessary [Edit Documents (XML)].
As necessary, add documents to Document Sets [Document Sets Maintenance (XML)].