Adding Documents: Scan
Add documents to a session using the Add Documents feature. Use the Scan option to scan documents and attach them to the session. To change or set your scanner settings, refer to Editing Workstation Scanner Settings for more information. Scanning is not applicable for iPads. Depending on the settings configured by your administrator, this feature may not be available.
Encrypted PDF documents cannot be attached. Attached documents must be less than 5 MB in size. A maximum of 10 documents can be attached per session. A maximum of 100 document pages can be attached when the session will be sent for remote signatures. Supported file formats are BMP, GIF, JPEG, JPG, PDF, PNG, TIF, and TIFF.
Refer to Adding Documents to a Session for general information about using the Add Documents feature.
To scan a document for this session, follow these steps:
-
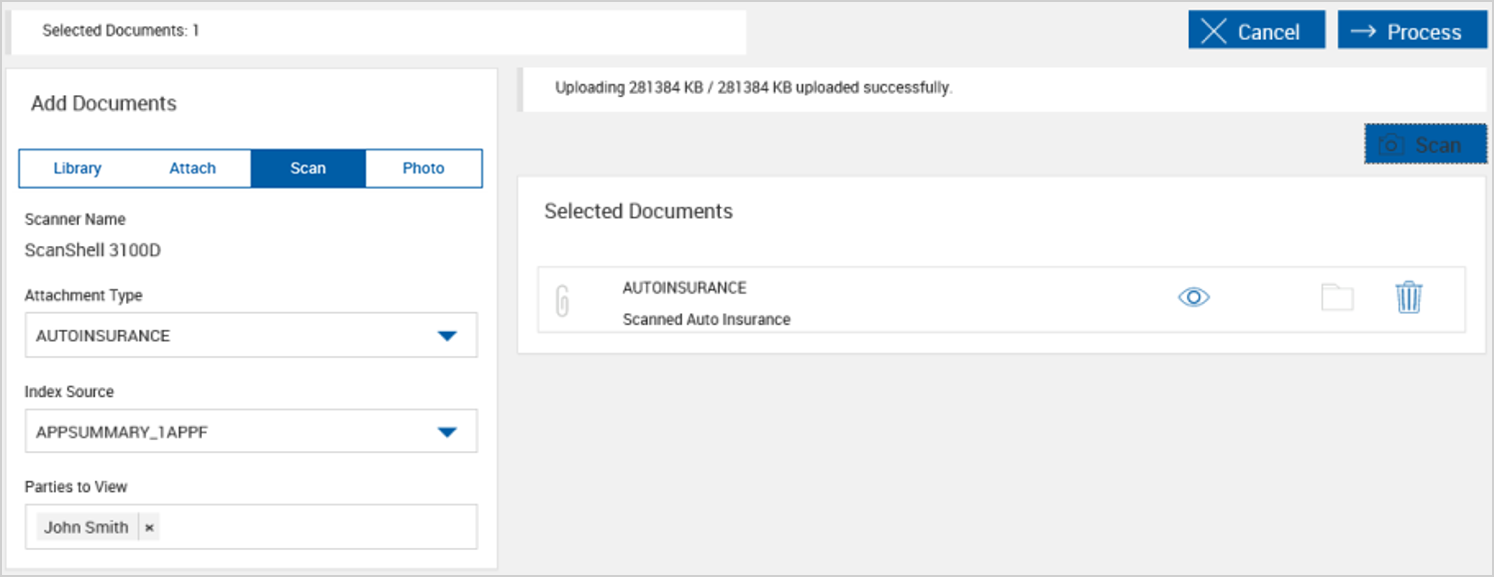
Click the Scan tab and select the desired values for each field.


Scanner Name: The name of the scanner is displayed here. 
Attachment Type: Select an attachment type from the dropdown menu. 
Index Source: Select a document to be used as an index source. 
Parties to View: Select one or more parties to have them view the file during the signing and reviewing process. -
To scan the file, click Scan.
Depending on the page, the Selected Documents or Documents section is displayed. The uploaded file is listed in the Selected Documents or Documents section.
Note: When the Show UI scanner setting is enabled, the Scan Panel popup is displayed to start and stop scanning. It is recommended to disable the Show UI setting. Use of the Scan Panel popup is not recommended with eSign. To change or set your scanner settings, refer to Editing Workstation Scanner Settings for more information.
-
When you are done adding documents,