Session Details Page
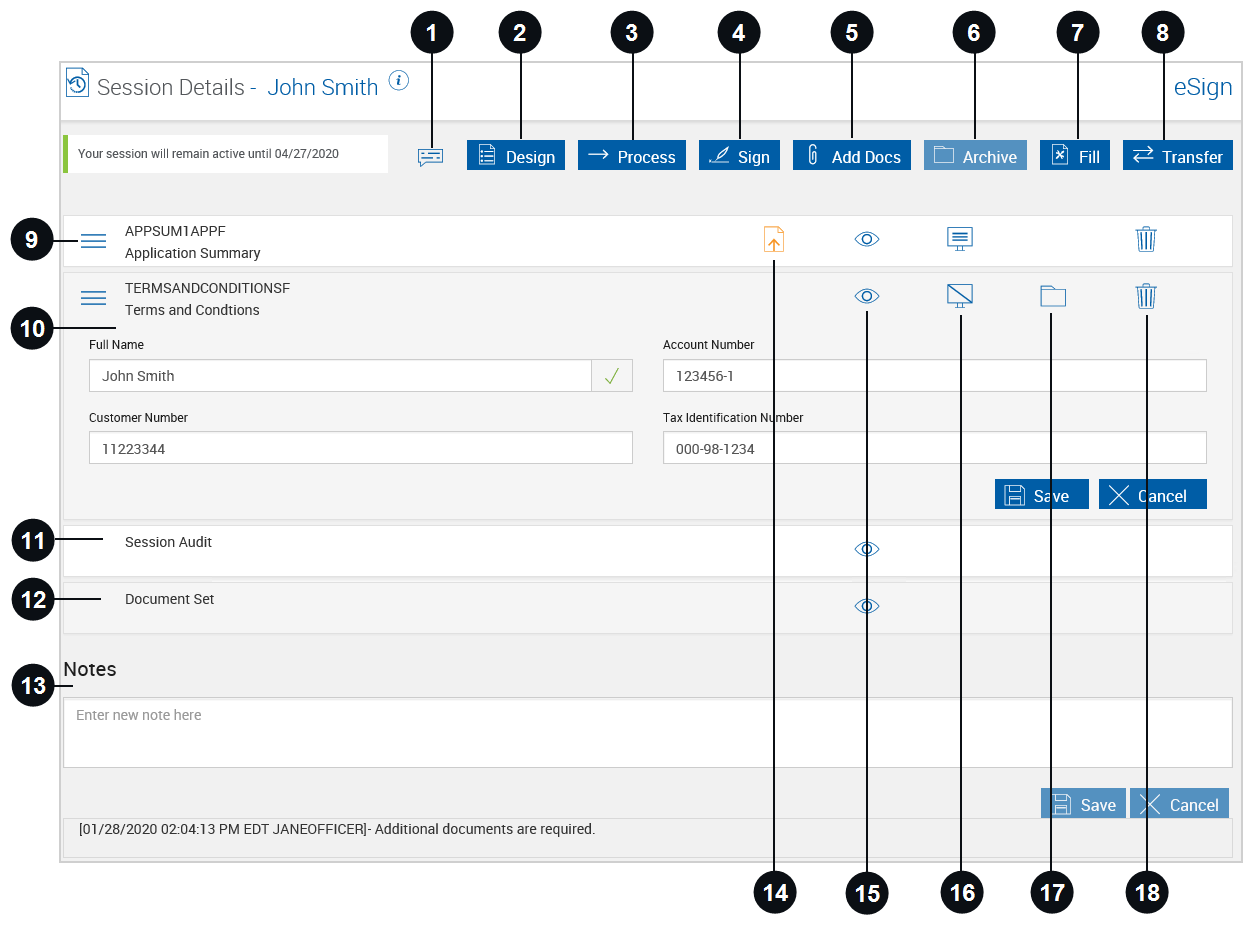
When an active session is opened in eSign, the Sessions Details page is displayed. Access Document Designer, process the session, begin the document signing process, add documents to the session, fill missing index information, transfer the session, add notes to the session, and archive the session here. In addition, view document and index information, preview documents, set the documents to display or not display during processing, delete documents from the session, reorder documents, and view the Session Audit Report. The features and functions available to you on this page are set by the administrator. Some of the features and functions described here may not be applicable to you.
Note: Click the Page Help  icon for a list of icons and functions available on the page.
For eSign Lite integrations, process the session, add documents to the session, add notes to the session, and complete the session here. In addition, view document and index information, preview documents, delete documents from the session, reorder documents, and view the Session Audit Report. For additional features such as signing, archiving, and Document Designer, upgrade to eSign.
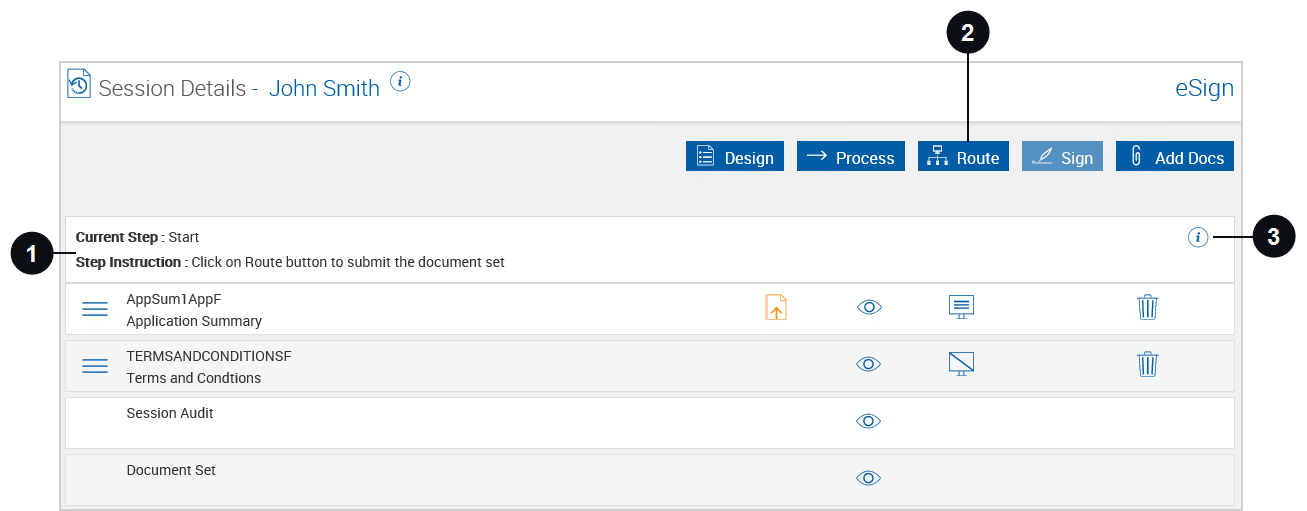
For eSignPlus integrations, the routing information is displayed on the Session Details page. All other features are the same as eSign. Refer to the following example.

|
Routing Information |
The current workflow step and the instructions associated with that step are displayed here. |

|
Route |
Click this button to route the session. Refer to Routing Documents for details. |

|
History |
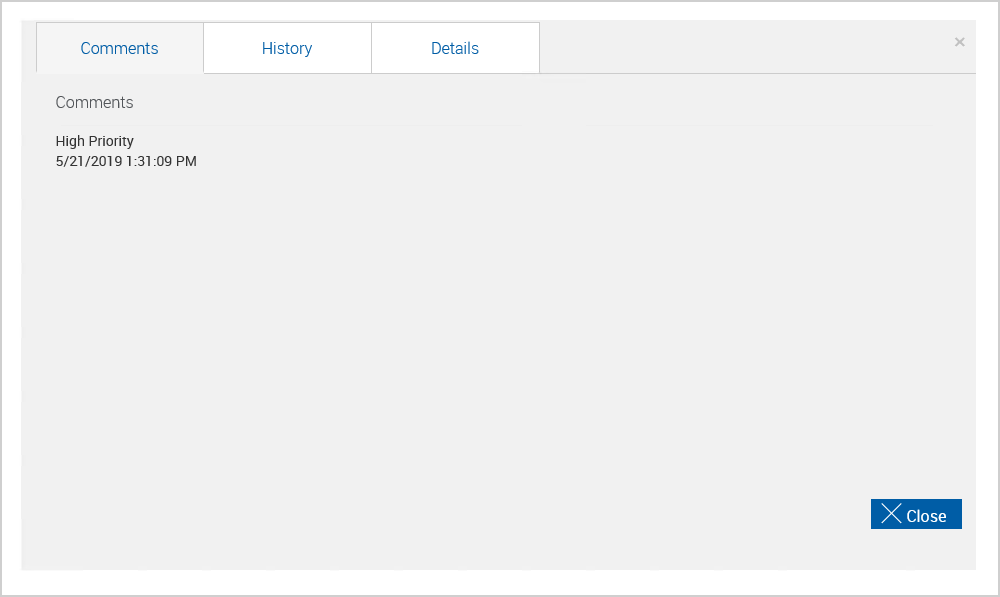
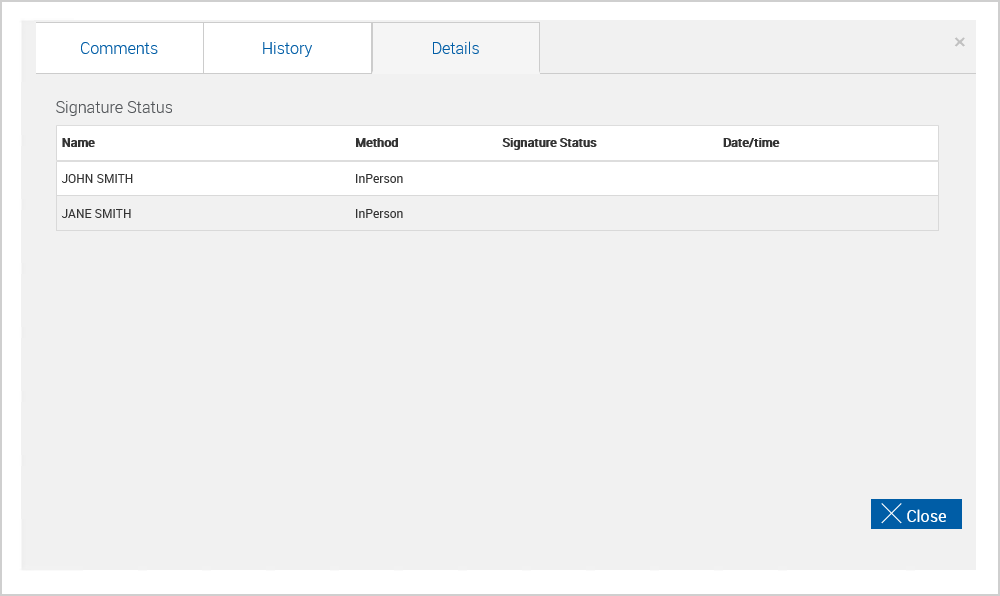
Click the History icon to open a popup containing the Comments, History, and Details tabs. The Comments tab displays the comments associated with the current workflow step.
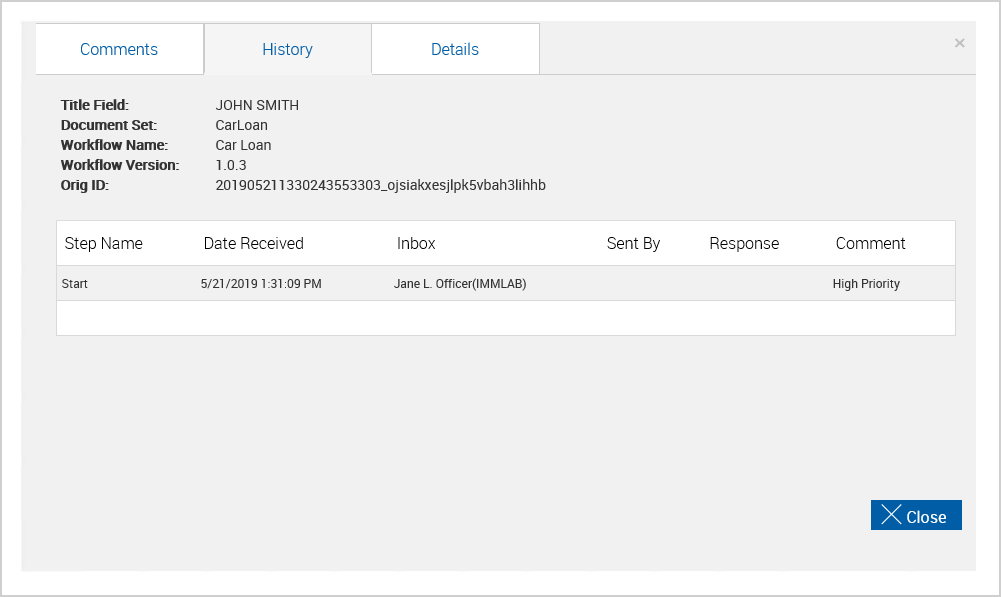
The History tab displays all of the information associated with the session.
The Details tab displays the signature statuses associated with the session.
|
Refer to the following information about the Session Details page when using a full featured eSign integration.
|
|
Note Alert | When this icon is visible, there are one or more notes associated with the session. Hover over the icon to view when the latest changes were made. Click the icon to go to the Notes section at the bottom of the Session Details page. |
|
|
Design / Review |
Click this button to access the Document Designer page. The Design button is disabled after document session ownership has been transferred. Depending on the permissions set by the administrator, this button may be replaced with the Review |
|
|
Process | Click this button to process documents. This button will be disabled if document session ownership has been transferred. The Process button will not be enabled if no documents are marked for display. Refer to Processing Documents for details. |

|
Sign |
Click this button to go to the eSignature Management page to begin signing documents in person or remotely. When unmapped or optional fields are detected, you are rerouted to a guided process to complete the actions. Refer to eSignatures for details. |

|
Add Docs | Click this button to attach documents, scanned items, and photographs to this session. Clicking the Add Docs button |

|
Archive | Click this button to archive the session. Archive finalizes the session for use by your imaging system for permanent storage. No additional changes are allowed after the session is archived. The Archive button will be enabled if all documents within the session have been signed or if no documents in the session have signature fields. Refer to Archiving Documents for details. |

|
Fill | Click this button to populate empty index fields with information extracted from other documents in the document set. Depending on the settings configured by your administrator and your environment, eSign might not be configured to fill missing index field information automatically from the core/host system. In this scenario, the Fill button would be used to populate the missing index field information using the information extracted from other documents in the document set. When an index field is created in eSign for one document, the Fill button can also be used to populate the index field information in all of the other documents in the document set. If the index field is not populated anywhere in the document set, clicking Fill will not correct the missing information. In certain configurations, this button is disabled if all index fields are populated. |

|
Transfer | Change session ownership of any selected sessions to another user. Refer to Managing Sessions for details. |
|
|
Reorder | Drag and drop the Reorder icon to change a document's order in the document set. |
|
|
Document Information | The name and description of the document in the document set is displayed at the top of the row. The indexes associated with the document are displayed below. To expand or minimize a session, click on the row. The default Session Details page can be displayed with the document indexes expanded or minimized. This view is determined by your Administrator. |
|
|
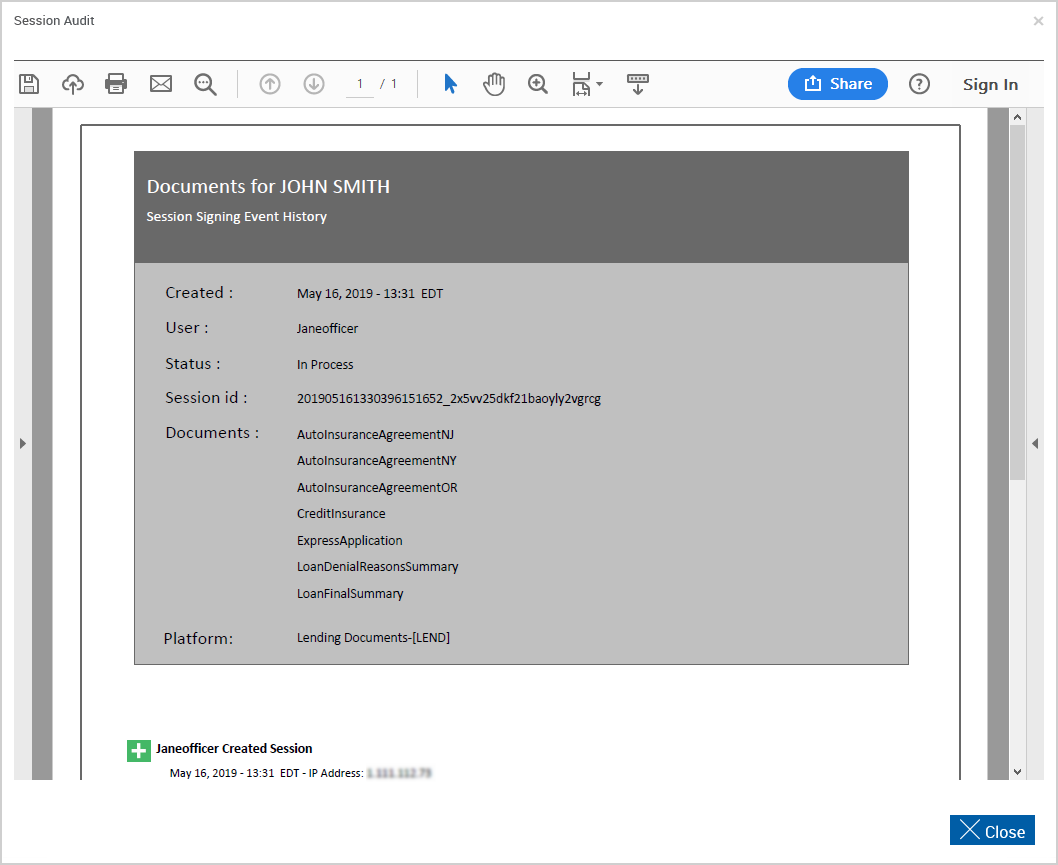
Session Audit |
Click the Preview icon to display the Session Audit. This report lists all activities that take place during a session. This report will be archived along with the documents. Click Close to exit the Session Audit PDF and return to the Session Details page.
|
|
|
Document Set | Click the Preview icon to view all of the documents in the document set in one PDF file. |
|
|
Notes |
Click in the Notes field to add information relative to the document, user, or transaction. There can be several notes added. Notes travel with the session until the session is archived. Notes are retained with the session but will not be archived with the document set. Click Save to add the note to the session. Click Cancel to delete the contents in the Notes field. |
|
|
Index Field Validations |
If index field information passes validation, no icon is displayed. If index field information fails validation, an icon is displayed. The permissions to correct index field and imaging index field information are set by your administrator. |

|
Preview Icon |
Click the Preview icon to view a single document in a PDF popup window. From this window, you can also print the document. Documents cannot be edited in Preview Mode. When the Preview icon is clicked for Session Audit, the Session Audit Report is displayed. This report lists all activities that take place during a session. This report will be archived along with the documents. Click Close to exit the Session Audit PDF.
When the Preview icon is clicked for Document Set, all of the documents in the document set are displayed in one PDF popup. |

|
Display / Do Not Display Icon |
Click the icon to toggle the display state of the document. When the Display icon is shown, the document is displayed in PDF format during processing. When the Do Not Display icon is shown, the document is not displayed during processing. This setting is controlled by the Administrator. The default state of this icon is determined when the document is defined. Attached documents with fillable data fields are automatically set to display. Administrators cannot control if attachments are displayed; however, the Retrieved Session Default administrative setting will apply to attached documents with fillable data fields. If the Preserve Original Selection administrative setting is selected, the user’s preference for the display of attachments is remembered. |

|
Archive Icon | Documents that can be archived have an Archive icon. The Archive icon will not be displayed if a document has an unsigned or unreviewed field. If the Archive icon is clicked, the document will be archived. |

|
Delete Icon | Click the Delete icon to the right of the document name to delete the document from the session. At least one document must remain on the list. Attachments can be removed. |